


I recently had to deploy a Ktor project to Railway for my hobby project. I'll share the how-to through this article.
Introduction
Ktor is a framework that allows us to build web applications in Kotlin, built and backed by Jetbrains. It's open-source, lightweight, and flexible, making it an excellent choice for building web applications in the JVM ecosystem.
Setting up the project
We'll be deploying a project that is generated for us by Ktor plugin, it is a simple Hello World! app. You can check it out live here or check GitHub repo here.
I've generated the project using the Ktor plugin but you can also generate it via Ktor Project Generator.
- Configure your project as required. Here I've added name and website, you can leave it as default. I am using Gradle Kotlin as the build system.

- Add
Routingplugin for handling incoming requests.

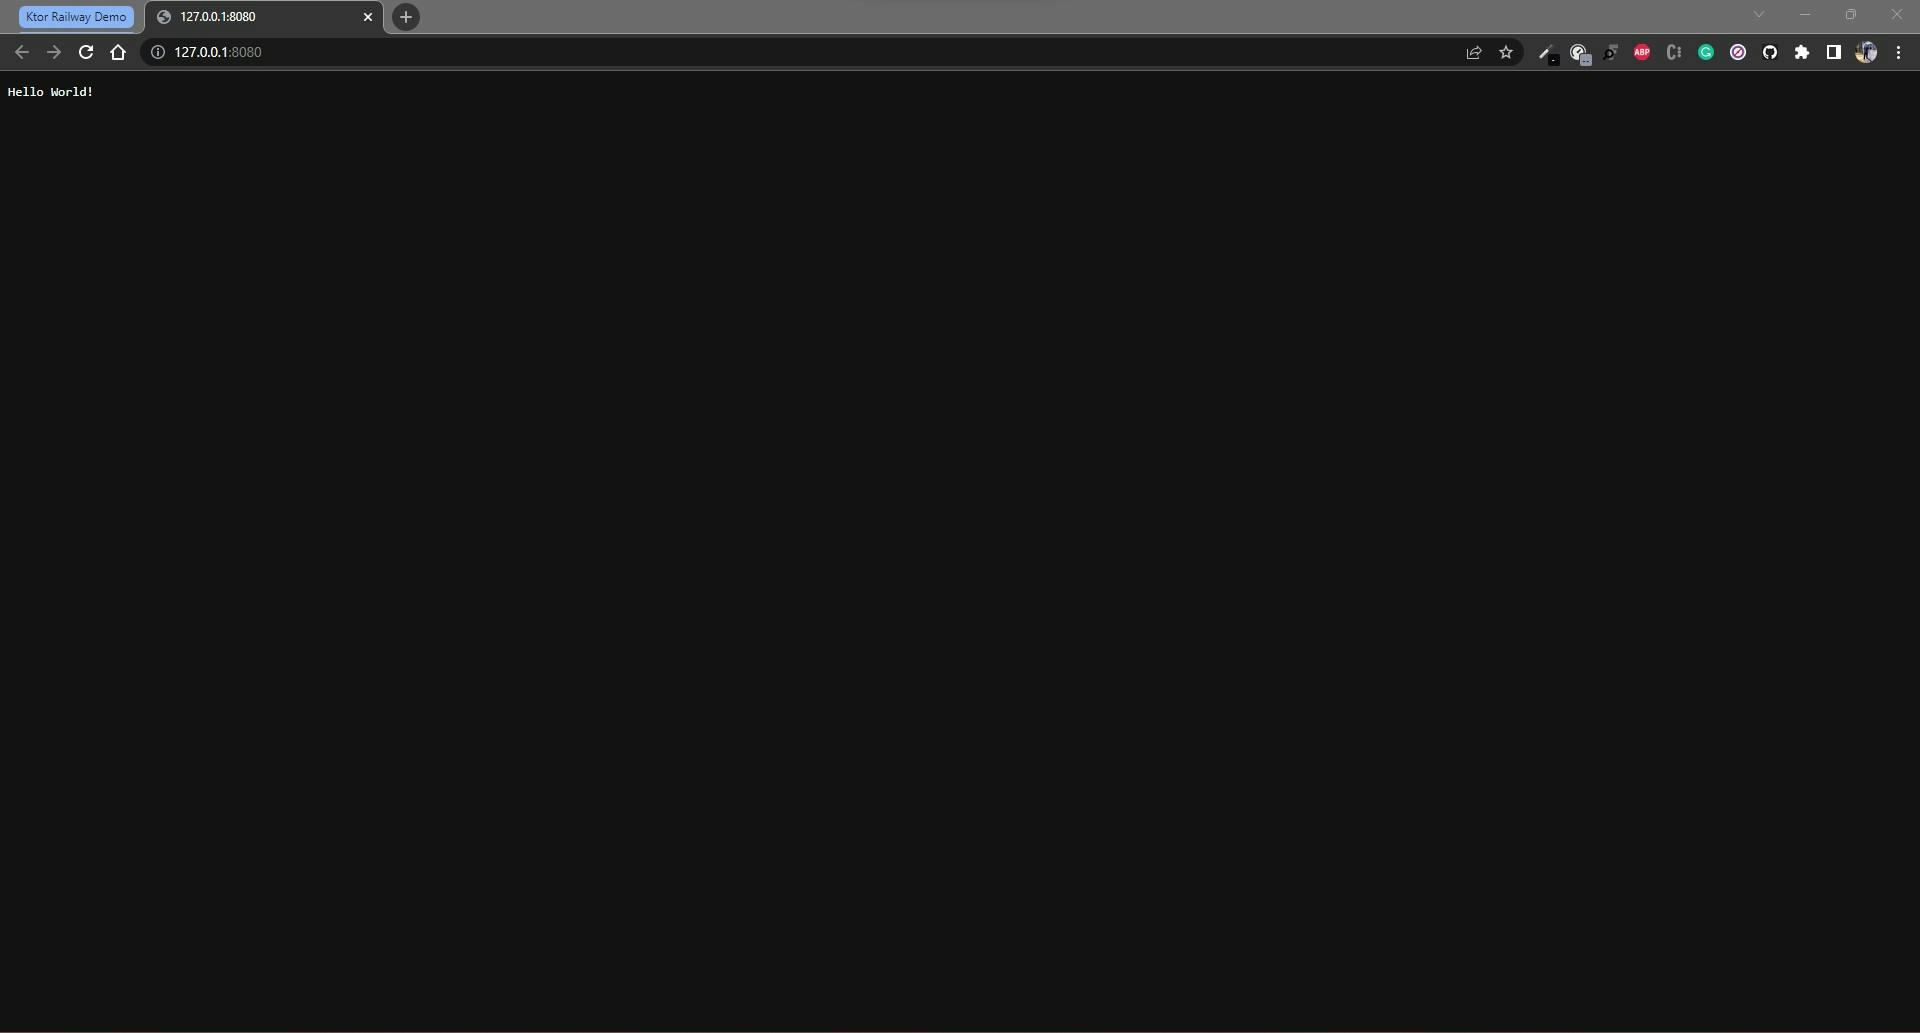
- Once the project is created, you can run the app and should get this in the terminal -
INFO ktor.application - Responding at http://127.0.0.1:8080
When you open the link it will open the browser and say Hello World!
I've added the Application.kt and Routing.kt file for reference below -
Application.kt -
package abhishekkumar.me

import io.ktor.server.application.*
import io.ktor.server.engine.*
import io.ktor.server.netty.*
import abhishekkumar.me.plugins.*

fun main() {
    embeddedServer(Netty, port = 8080, host = "0.0.0.0", module = Application::module)
        .start(wait = true)
}

fun Application.module() {
    configureRouting()
}
Note: By default the Port is 8080 and host is 0.0.0.0, you can change it in Application.kt file.
Routing.kt -
package abhishekkumar.me.plugins

import io.ktor.server.routing.*
import io.ktor.server.response.*
import io.ktor.server.application.*

fun Application.configureRouting() {
    routing {
        get("/") {
            call.respondText("Hello World!")
        }
    }
}
- I'll be deploying this app from Github, so I've created a repository and pushed my code (link).

All done from here, now let's head over to Railway dashboard.
Select
New ProjectandChoose Deploy from Github repoSelect your GitHub repo, I have selected my repository
imabhishekkumar/ktor-demoClick on
Add variables

We will add PORT variable that we have configured in the project. By default it's 8080.

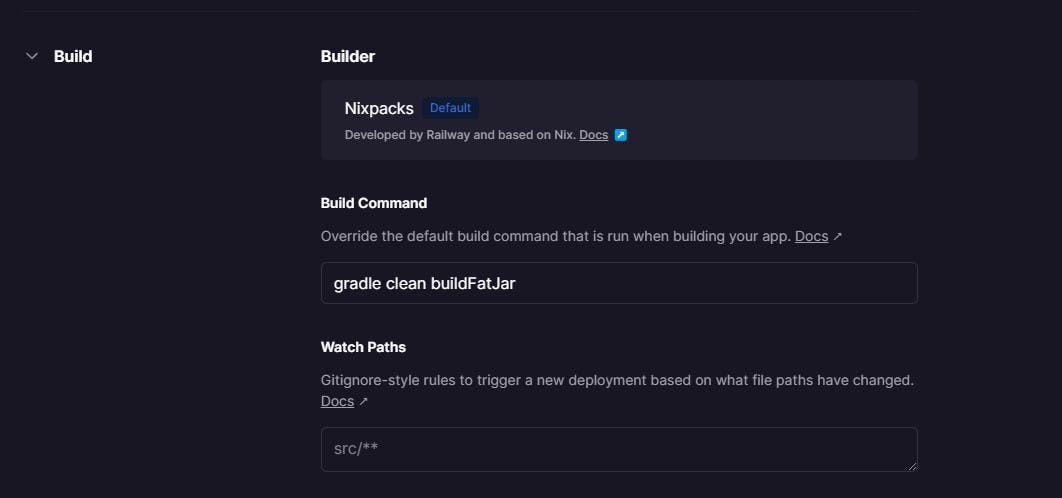
In the Settings tab, we'll add the build command and deploy command for Ktor as per the documentation here
Build - gradle clean buildFatJar
Deploy- gradle runFatJar

Once that is done, we want to add a domain to make our service available to public internet. Railyway provides free domain for us. In the Settings tab, click on Generate Domain or use your custom domain.

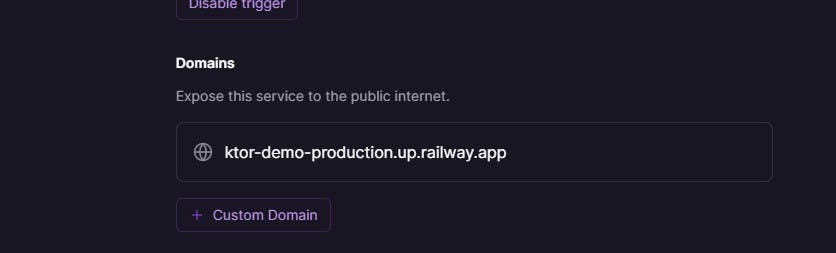
Once that is done, our project is hosted and accessible via the domain.
Here's my dummy project - ktor-demo-production.up.railway.app
I hope this article was helpful. If you have any questions, feel free to reach out!
Follow for more articles about Ktor (as I explore) and Mobile development.
Connect with me -